Are you looking to harness the power of data-driven optimization strategies to bolster your website’s SEO? Look no further! This comprehensive guide on using Google Search Console for SEO will take you through every feature, offering expert tips and techniques. Discover invaluable insights into keyword research, index coverage, link reports, and more—all designed to give you a competitive edge in today’s digital landscape. Buckle up, and let’s dive into the world of Google Search Console!
Introduction to Google Search Console
As a cornerstone tool for web admins, marketers, and SEO specialists worldwide, Google Search Console is a treasure trove for analyzing site performance and organic visibility. Previously known as Webmaster Tools, this free service offered by Google allows users like yourself to monitor traffic patterns, optimize the content through relevant keywords, troubleshoot indexing problems, identify linking opportunities—the list goes on.
Understanding how to use Google Search Console effectively paves the way for better search rankings and an enhanced user experience overall. With features that shed light on your site’s mobile usability or even rich results powered by structured data markup codes (Schema), there’s little wonder why millions cherish this indispensable resource. Read on as we explore each aspect of this powerful platform, from setting up an account to linking it with popular tools like Google Analytics— arming you with the knowledge required to survive and thrive online.
What is Google Search Console?
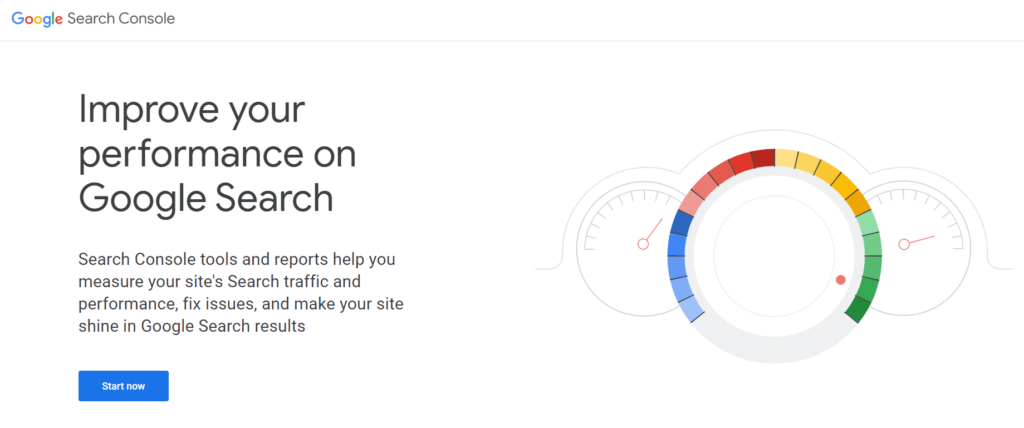
Google Search Console, formerly known as Google Webmaster Tools, is a free web service offered by Google to help website owners, SEO experts, and digital marketers monitor the performance of their websites in search results. The tool provides invaluable insights into a website’s online presence, such as indexing status, mobile usability, and crawl errors.
In addition to these essential features, the platform enables users to analyze keyword rankings and identify potential SEO opportunities for improvement. By understanding how to use Google Search Console for SEO, websites can enhance their search engine visibility and optimize their content for better organic traffic results.
Some essential functionalities that Google Search Console offers include:
- Tracking your website’s rankings in search results
- Identifying keywords driving organic traffic to your site
- Monitoring index coverage issues that affect how well Google indexes your website
- Analyzing mobile-friendly design elements and ensuring optimal user experience for mobile visitors
- Receiving alerts regarding manual actions or security issues impacting your site’s performance
As you dive deeper into SEO, knowing how to use Google Search Console effectively becomes crucial for staying ahead in today’s competitive digital landscape. In the following sections, we will explore how you can harness this tool’s capabilities to maximize its impact on your website’s performance and rankings in search results.
Setting Up an Account
Setting up an account is essential before diving into how to use Google Search Console for SEO. The process is straightforward and requires only a few steps.
Step 1: Visit the Google Search Console Website
To get started, visit the official Google Search Console website. Ensure you’re logged into your preferred Google account, which will be linked with your search console credentials.
Step 2: Add Your Property (Website)
Click on the “Start Now” button, which will take you to the next page where you can add your property (website URL) in one of two ways:
- Domain: Enter your domain name (e.g., example.com). This method requires verification by adding a TXT record in your domain’s DNS settings. It’s beneficial because it covers all subdomains and protocols (http and https).
- URL Prefix: Enter the specific URL of your site, including its protocol (HTTP or https) and preferred version (www or non-www). You’ll need to verify ownership using various methods like uploading an HTML file, using a meta tag, or updating a DNS record.
Choose the method best suited for your circumstances and follow the instructions for verifying ownership.
Step 3: Verify Site Ownership
Next, you’ll need to verify site ownership you’ve added. To do this, select one of the provided methods according to your choice from step 2:
- HTML file upload – download a unique HTML file generated by Google and upload it to your website’s root directory.
- HTML tag – copy-paste a unique meta tag from Google into the head section of your site’s homepage.
- Google Analytics tracking code – ensure administrator access has been granted within Google Analytics.
- Google Tag Manager container snippet – ensure administrator access has been given within Google Tag Manager.
You should consult your web developer or website hosting provider for assistance completing the above steps if necessary. Once finished, click “Verify.”
Step 4: Set Your Target Country and Preferred Domain (Optional)
After verifying your site, visit the “Settings” tab on Google Search Console’s left-hand menu. Here you can set your target country and preferred domain (www [like www.example.com] or non-www [like example.com]), thus ensuring consistency across search engines.
Final Thoughts
Congratulations! You have successfully set up a Google Search Console account for your website. In the subsequent sections of this article, I’ll guide you through optimizing SEO by utilizing various features provided by the platform. Now that you’re all set let’s explore how to use Google Search Console for SEO in depth.
Google Search Console Features
Google Search Console is an essential tool for anyone who wants to optimize their website’s SEO. By providing access to many features, this platform enables users to better understand and manage their online presence in the context of Google search results. This section will discuss some of the most valuable features of Google Search Console.
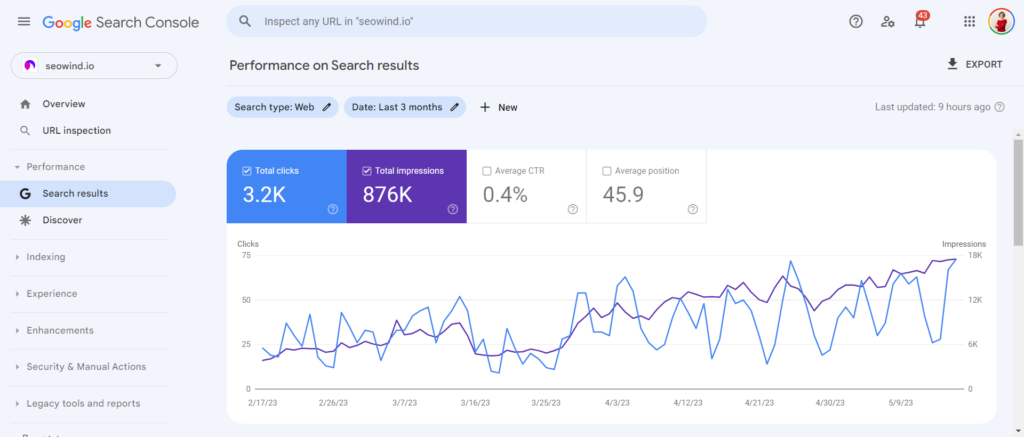
Performance Tab

The performance tab provides valuable insights into how your website fares in Google search results. This includes data about clicks, impressions, click-through rate (CTR), and average position for specific queries. You can use these metrics to identify areas where your site performs well and opportunities for improvement. Additionally, you can compare date ranges and filter data by various criteria, such as country or device type.
Indexing
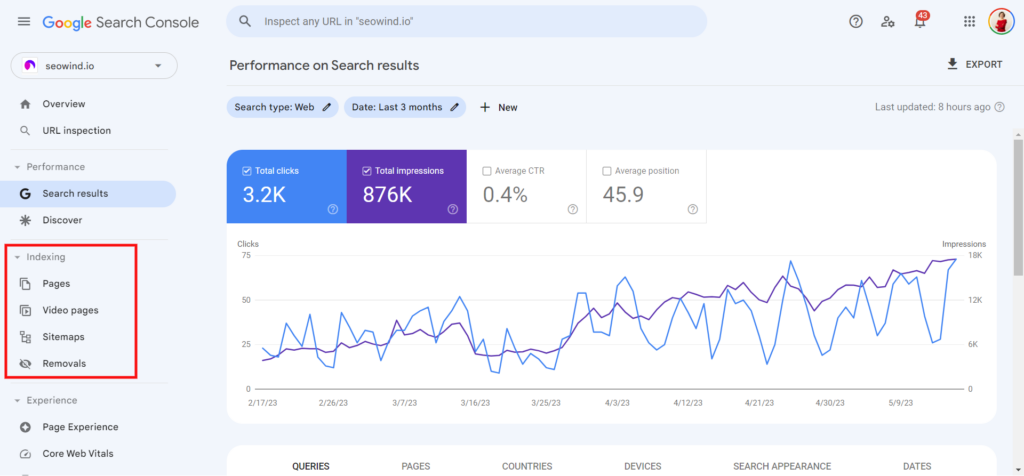
Proper indexing is crucial for your website’s search appearance. The index coverage report shows which pages on your site are indexed by Google. It identifies any errors that might be causing issues with indexing certain pages. Resolving these errors will help improve your site’s overall visibility in.
URL Inspection
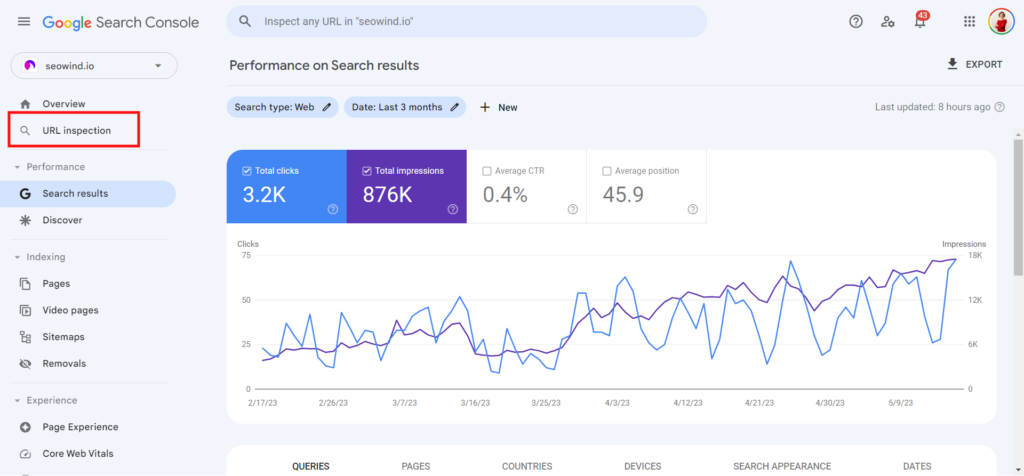
This feature allows you to analyze individual URLs on your site in real time. When you input a URL into the inspection tool, it will provide details about its index status, crawlability, structured data validity, AMP compatibility, and more. It will also display any issues related to the web page’s ability to appear in search results and recommendations for addressing those problems.
Experience
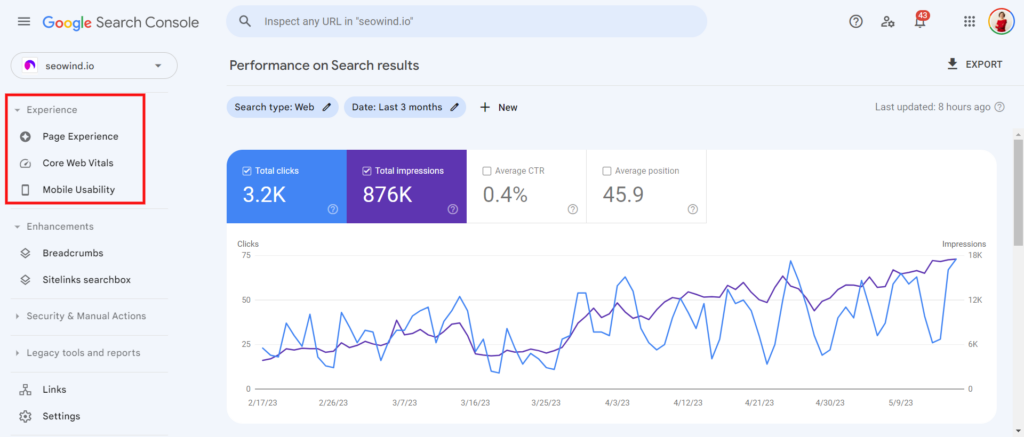
Nowadays, user experience significantly determines how well a website ranks on Google search results pages (SERPs). As part of its effort to prioritize user experience within its algorithm updates,
Google introduced Core Web Vitals — metrics measuring web usabilities such as loading performance, interactivity, and visual stability. The experience tab displays Core Web Vitals scores for your site so you can address potential issues affecting user satisfaction.
Mobile Usability
With most search traffic originating from mobile devices, your site needs to function well on these platforms. The mobile usability report highlights issues that could hurt user experience when viewed on smartphones or tablets. By addressing these problems, you can ensure your website caters effectively to desktop and mobile users.
Enhancements: Rich Results
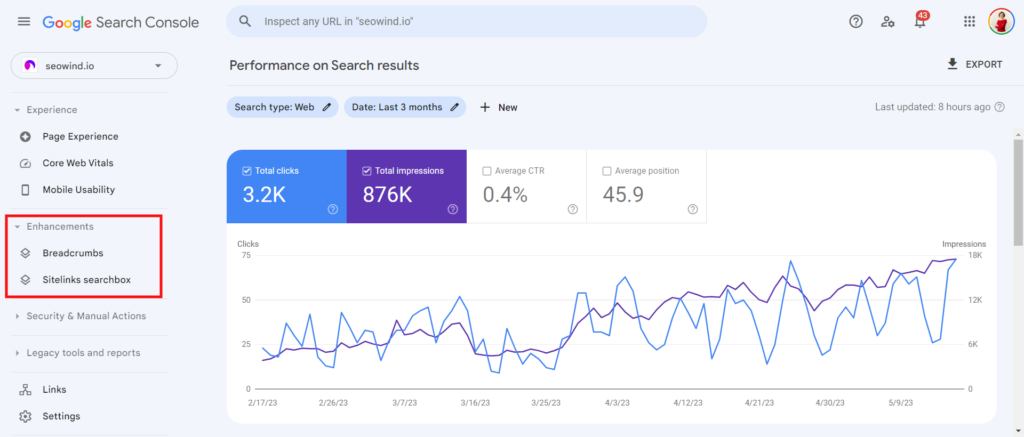
Rich results are specialized search result listings that include additional information such as images, ratings, and pricing details. Google Search Console provides several tools within the enhancements section to help you implement rich results using structured data markup. Ensuring these features are correctly set up enhances the appearance of your site in SERPs and improves click-through rates.
Sitemaps
Sitemaps act as roadmaps for search engine crawlers by listing all URLs on your website and metadata about each page (e.g., modification date). Submitting an updated sitemap via the console ensures have access to all relevant pages on your site, leading to a faster indexing process.
Shopping
If you operate an e-commerce website, the shopping tab offers a range of valuable resources geared towards improving product discovery and sales performance through Google searches. This includes optimizing product listings for various types of campaigns (e.g., Shopping ads) and providing feedback on potential issues affecting your shopping content.
Links
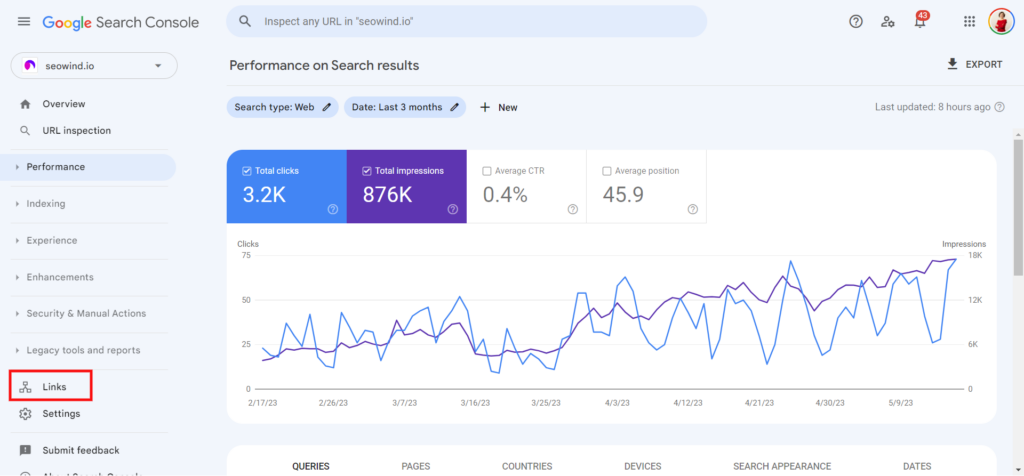
Understanding links between websites is integral to good SEO practices. Within Google Search Console is a dedicated section for monitoring internal and external links related to your site. Data regarding top linked pages, domains referring to traffic
Linking Google Analytics to Search Console
Integrating Google Analytics with Google Search Console can provide valuable insights into the overall health of your website and how it performs in search results. When linked, you can access comprehensive data on organic search performance, user behavior, keywords driving traffic to your site, and potential technical issues. This section will discuss the benefits of linking these two powerful tools and guide you through the step-by-step process.
Benefits of Linking Google Analytics and Search Console

There are several advantages to connecting Google Analytics with Google Search Console:
- A comprehensive view of organic search performance: You can easily access essential SEO-related metrics through a single interface by linking these platforms.
- Enhanced keyword data: Gain deeper insight into which specific search queries drive traffic to your site by combining information from both services.
- Improved decision-making capabilities: With combined data at your fingertips, you can decide about optimizing your website for optimal SEO performance.
- Streamlined troubleshooting: If any technical issues emerge related to indexing or crawling errors, having all vital data available in one place will simplify diagnosing and resolving the problem.
Step-by-Step Guide to Linking Google Analytics and Search Console

Follow these straightforward steps to establish a connection between Google Search Console and Google Analytics:
- Verify that you have administrative rights for both accounts: You need admin-level permissions to link the two platforms successfully.
- Log into your Google Analytics account: Navigate to Google Analytics using your login credentials.
- Choose the right property (website) from the dropdown menu in the top-left corner if multiple properties are accessible within your account.
- Access Property Settings by clicking on “Admin” in the bottom-left corner of the page and then selecting “Property Settings” under the “Property” submenu column.
- Scroll to the bottom of the “Property Settings” page to find the “Search Console” section and click on “Adjust Search Console.”
- Click “Add Connection,” redirecting you to Google Search Console.
- Upon arrival at Google’s interface, choose the appropriate property (website) from your list and click “Continue.” Ensure that this corresponds with the property in Google Analytics.
- Return to Google Analytics: In Property Settings, navigate to the Search Console Integration page, where you should see a confirmation message denoting successful linkage.
You have now successfully connected your Google Analytics account with your website’s data in Google Search Console! As a result, critical SEO-related data will be channeled directly into your Analytics platform for convenient monitoring and optimization opportunities. By learning how to use Google search console alongside an analytics tool effectively, you can elevate your overall SEO strategy and reap impressive benefits for your online presence.
Adding and Removing Owners/Users in Search Console
Google Search Console is a powerful SEO tool that allows you to effectively monitor your website’s performance, identify critical issues, and optimize its presence on search engine results pages. One of the administrative features that Google has provided is the ability for multiple users to access and manage the data within your site’s search profile. Let’s go through the main roles.
Types of Users in Google Search Console
You can assign three basic types of access levels in Google Search Console: Owner, Full User, or Restricted User. Depending on their role within the organization, each user can have different permissions:
- Owner: An owner has complete control over all functionalities within the console, like adding/removing accounts or deleting properties. They can also give permissions to other users.
- Full User: A full user has expanded privileges; they are allowed access to almost all functionalities on Google Search Console except managing properties’ settings or granting permissions.
- Restricted User: As the name implies, specified users have limited privileges; they can only view data without making significant changes.
Adding an Owner/User
To add an owner/user, follow these simple steps:
- Log into your Google Search Console account using your primary login credentials.
- Select the property (website) where you want to grant new permissions from the dropdown menu at the top-left corner.
- Click on “Settings” in the left-hand menu.
- Under “Property settings,” scroll down to “Users and Permissions.”
- Click the “+ Add User” button in the right corner after entering the desired user’s email address (associated with a Google Account).
- Selection ‘permissions level’ among those options above before clicking “Add.”
This fellow user will receive an email notification about the granted access, and they can start working with Google Search Console.
Removing an Owner/User
Should you need to remove a user’s access from the Google Search Console, follow these guidelines:
- Access your account in Google Search Console.
- Select the relevant property where permissions need to be revoked.
- Click on “Settings” followed by “Users and Permissions.”
- Look for the specific user who should lose privileges when scrolling down the available list; click the three-dotted icon immediately with their name.
- In the menu that appeared, select the “Remove access” option confirming the decision later within the popped-out window accordingly.
Following these steps will successfully revoke a user’s access to your search console data, ensuring that only authorized individuals have continuous visibility into your website’s performance metrics and analytics information.
Keeping your account up-to-date with proper owner/user permissions is essential for effective teamwork, maintaining accountability, and safeguarding sensitive data. Regularly reviewing user accesses will help you take full advantage of Google Search Console’s vast features while keeping undue risks at bay or any potential harm due to wrongful interventions at a minimum level.
Checking the Health of Your Website with Search Console
Google Search Console is an indispensable tool for monitoring the health of your website and identifying areas that need improvement. By keeping track of several key metrics, you can effectively optimize your site’s performance and prevent potential problems that could hurt your search engine rankings. This section will explore some essential features in Google Search Console that helps maintain a healthy website.
Index Coverage Report
The Index Coverage report allows you to analyze how well Google crawls and indexes your site’s content. By monitoring this report, you can identify indexing errors or issues related to crawling, such as server errors and blocked resources. To use the Index Coverage report:
- Log in to your Google Search Console account.
- Click on ‘Index’ in the left-hand menu.
- Select ‘Coverage.’
This report shows the total number of indexed pages and any errors or warnings found during the crawling process.
Core Web Vitals
Core Web Vitals is a set of user-focused performance metrics that measure important aspects of user experience on your site, such as loading speed, interactivity, and visual stability. Keeping track of these metrics helps ensure a better overall user experience, ultimately contributing to improved SEO results.
To access Core Web Vitals data:
- Navigate to ‘Experience’ in the left-hand menu.
- Click on ‘Core Web Vitals’.
Here you will find both mobile and desktop data related to Largest Contentful Paint (LCP), First Input Delay (FID), and Cumulative Layout Shift (CLS). Use this information to pinpoint areas where you need to make improvements.
Mobile Usability
Mobile usability should be a top priority since more smartphone users are accessing websites than ever. With this feature, Google helps website owners identify issues affecting mobile experiences by providing actionable insights into their sites’ mobile-friendliness.
To access Mobile Usability data:
- Click on ‘Experience’ in the left-hand menu.
- Select ‘Mobile Usability’.
Address any issues reported here to improve your site’s mobile experience and cater better to an increasingly mobile audience.
Page Experience Report
The Page Experience report combines various user experience and technical metrics, including Core Web Vitals, mobile usability, HTTP/HTTPS usage, and the absence of intrusive interstitials. By analyzing this report, you can assess how well your website meets Google’s page experience criteria.
To access the Page Experience report:
- Navigate to ‘Experience’ in the left-hand menu.
- Click on ‘Page Experience’.
By utilizing these features within Google Search Console, you can effectively check the health of your website and implement necessary improvements for enhanced SEO performance. Keep a close eye on these reports and adjust as needed to maintain a user-friendly and optimized online presence.
Using the Overview Report

The Overview report in Google Search Console provides a snapshot of your site’s overall performance and health. This comprehensive summary is essential for identifying potential SEO opportunities and addressing issues affecting your site’s visibility on search engine results pages (SERPs). This section will discuss using the Overview report to improve SEO using Google Search Console and enhance your website’s organic traffic.
Analyzing Site Performance Metrics
When accessing the Overview report, you’ll gain insights into critical performance metrics such as total clicks, impressions, average click-through rate (CTR), and average position. By examining these statistics, you can identify trends, spot improvements or declines in your site’s visibility, and determine areas to optimize
- Total clicks: The number of times users clicked on your website from search results.
- Impressions: The number of times your website appeared in search results.
- Average CTR: The percentage of users who clicked on your URL after seeing it in the search results.
- Average position: Your site’s average ranking across all its targeted keywords.
Monitor these metrics regularly to monitor the effectiveness of any SEO strategies you have implemented and make data-driven decisions about adjustments needed to optimize results further.
Identifying Indexing Issues
The Overview report also highlights indexing issues by displaying error types identified across multiple URLs within your domain. Common errors include server errors (5xx), 404 not found errors, and accessibility issues like blocked content by a robots.txt file or noindex directives.
By monitoring these reported problems over time, you can take corrective actions quickly when issues arise, ensuring your content remains visible and accessible on SERPs. Remember that if Google cannot find or index a web page correctly, it won’t display it in search result pages; therefore, fixing these indexing issues is crucial for SEO success.
Reviewing Enhancement Opportunities
Finally, the Overview report showcases specific enhancement opportunities for your website, such as Mobile Usability issues or AMP (Accelerated Mobile Pages) problems. Identifying and addressing these aspects can enhance the user experience and improve your site’s performance in web search results.
Remember that when working on these improvements, a well-optimized site provides valuable content, seamless navigation, and frictionless experiences for desktop and mobile users.
In summary, utilizing the Overview report is crucial to make the most out of Google Search Console for SEO purposes. By focusing on critical performance metrics, addressing indexing errors, and acting on available enhancement opportunities, you will be better equipped to optimize your site’s visibility in organic search results. So remember to include this valuable tool in your arsenal of SEO strategies!
Using the Performance Report
The Performance Report in Google Search Console is a powerful tool that provides crucial insights into your website’s search performance, including clicks, impressions, average click-through rate (CTR), and average position. By understanding how to utilize this feature, you can optimize your website for SEO and improve its overall visibility within Google search results. In this section, we’ll discuss navigating the Performance Report and how it can help you enhance your website’s online presence.
Accessing the Performance Report
To access the Performance Report, follow these simple steps:
- Log in to your Google Search Console account.
- Choose the property (website) for which you want to view data.
- Click on “Performance” from the left-hand sidebar menu.
After completing these steps, you’ll see an overview of key performance metrics for your selected property.
Analyzing Key Google Search Console Metrics
Within the report, several essential metrics provide valuable information about your website’s search performance:
- Clicks: The total number of times users have clicked through to your site from search results.
- Impressions: The total number of times any URL from your site has appeared in user search queries.
- CTR (click-through rate): Calculated as clicks divided by impressions expressed as a percentage. This indicates the proportion of users who clicked on your page after seeing it in search results.
- Average Position: This represents the average ranking position across all keywords, driving traffic to your site.
Filtering and Segmenting Data
One significant benefit of using Google Search Console’s Performance Report is its robust filtering capabilities. Depending on specific objectives or areas requiring improvement, you can segment data based on several dimensions, such as:
- Date Range: Assess changes over time or identify trends by selecting custom date ranges.
- Query: Review performance metrics for specific search queries or keywords driving traffic to your site. This can help you analyze how well your website ranks for targeted terms.
- Device Type: Gain insights into your website’s performance across desktop, mobile, and tablet devices, which may shed light on potential usability issues.
- Search Appearance: Understand visibility within various rich results (e.g., Featured Snippets) to optimize content accordingly.
Use these filters to make more informed decisions about SEO strategies and pinpoint areas needing attention or improvement.
Leveraging Data for Continued Improvement
The Performance Report is most effective when utilized as a part of ongoing monitoring and optimization efforts for your website. You can maximize your site’s exposure in Google search results by periodically reviewing the data provided, keeping track of variations in key metrics over time, and adjusting strategies based on the findings. That way, you give yourself a competitive edge as you consistently improve SEO performance through data-driven decision-making.
Using the Link Report

When optimizing your website for better SEO, one of the essential aspects you must pay attention to is the quality and quantity of backlinks pointing to your site. The Link Report in Google Search Console enables you to keep track of these backlinks and understand their impact on your site’s performance. In this section, I will guide you through using the Link Report for effective search engine optimization.
Accessing and Understanding the Link Report
To access the Link report, follow these steps:
- Log in to your Google Search Console account.
- Select your website from the property list.
- Navigate to the “Links” tab in the left sidebar menu.
The report contains two key sections: ‘External Links’ and ‘Internal Links.’ External links refer to other websites linking back to your domain name or specific pages on your website. In contrast, internal links represent connections between different pages within your site.
Analyzing External Links
By analyzing external links in the link report, you can identify which websites are pointing back to yours and which content they find valuable. Here are a few factors you should keep an eye on:
- Top linked pages: This displays a list of popular target pages receiving external links from other domains ranking by descending order of total count.
- Top linking sites: The most frequently linked domains to your website can be found here.
- Top linking text: Also known as anchor text, this shows how other websites reference your pages through hyperlink text.
Understanding these details will help determine if your backlink profile aligns with your SEO strategy and whether you need further changes.
Analyzing Internal Links
A well-planned internal linking strategy can improve usability, user satisfaction, and search engine rankings. To analyze internal links in Google Search Console’s link report:
- Click on “Internal Links”.
- Review each line item to see the most linked pages within your website.
- Remember that your homepage will likely have the highest number of internal links, so pay close attention to other relevant pages.
Internal links can signify an essential part of your site’s architecture or indicate valuable content. Maintain a balance between linking different content pieces without overloading them for users’ ease and search engine algorithms.
Maximizing the Link Report for SEO Efforts
With this comprehensive report at hand, you can easily optimize both external and internal linking by taking the following steps:
- Reach out to relevant websites with quality content for potential linkage opportunities.
- Monitor new backlinks frequently from influential sites, ensuring they use appropriate anchor text.
- Analyze top-linked pages on your website and create relevant, related content to strengthen your presence in those niches.
- Improve your internal linking strategy by connecting interrelated pieces of content through meaningful navigation paths.
By leveraging Google Search Console’s link report effectively, it becomes easier to understand how well-connected your website is and identify areas where there might be room for improvement when optimizing for enhanced search engine performance.
Using the Index Coverage Report
The Index Coverage Report is an invaluable tool within Google Search Console that provides valuable insights into how well Google is indexing your website’s content. It allows you to monitor indexation issues, view pages excluded from indexing, and enhance your site’s SEO. So let’s dive deep into understanding and using the Index Coverage report effectively.
Importance of Index Coverage Report for SEO
Understanding and utilizing the Index Coverage report is essential when optimizing your site for search engines. The primary benefits include:
- Identifying crawling and indexing errors: By analyzing this report, you’ll be able to discover any pages that haven’t been appropriately indexed or are encountering various types of errors.
- Monitoring submitted sitemaps: You can check whether Google successfully indexes the URLs mentioned in your submitted sitemaps.
- Assessing index status over time: Viewing historical data about your site’s indexation lets you understand patterns or changes that could impact SEO efforts.
Components of the Index Coverage Report
Here are the four main components of the Index Coverage report:
- Error: This section highlights critical issues potentially affecting your site’s visibility on search results, such as server errors or crawl anomalies.
- Warning: A less severe case than errors, warnings represent potential problems with specific pages on your site that may need attention – examples include indexing without content or incorrectly tagged nofollow links.
- Valid: You’ll find information about all successfully indexed pages recognized by Google Search Console.
- Excluded: This area displays a list of URLs intentionally excluded from Google’s index due to factors like explicitly marked noindex tags, duplicate content, or crawl directives in the robots.txt file.
How to Use the Index Coverage Report Effectively
To make the most out of this insightful tool in improving your website’s SEO performance, follow these steps:
- Analyze the report regularly: Review the Index Coverage report at least once a month to ensure your website’s indexing is running smoothly. This will help you avoid potential problems impacting your site’s search performance.
- Address errors and warnings promptly: Whenever you spot any errors or warnings in the report, immediately rectify them, as they could negatively impact your site’s organic visibility on search engine result pages (SERPs).
- Monitor excluded URLs closely: Some URLs may be deliberately excluded from Google’s index; however, keep an eye on this section to ensure that no important content is unintentionally omitted.
By leveraging the full potential of Google Search Console’s Index Coverage report, you will gain essential insights into how well your content is indexed by Google while identifying areas for improvement. Regularly monitoring this valuable data source allows you to optimize your website and improve its overall search performance.
Using Sitemaps
Sitemaps are essential for improving SEO, as they help search engines like Google understand your website’s structure and content hierarchy. In this section, I will explain how to use Google Search Console effectively for creating, submitting, and monitoring sitemaps.
Creating a Sitemap
Before you can submit a sitemap to Google Search Console, you need to create one. A sitemap is typically an XML file that lists all the URLs of your site along with additional information such as:
- The date each URL was last updated
- The frequency at which you expect them to change
- The importance of each URL to others on your site
To create a sitemap, you can generate it manually or use third-party tools like Screaming Frog, Yoast SEO plugin (for WordPress websites), or Google XML Sitemaps generator.
Submitting Your Sitemap in Google Search Console
Once you have generated your sitemap file and placed it in the root directory of your website (e.g., https://www.example.com/sitemap.xml), follow these steps to submit it via Google Search Console:
- Log in to your Search Console account.
- Select the property (website) you want to submit the sitemap.
- Navigate to the “Sitemaps” tab under the “Index” section in the left menu.
- Enter the URL of your sitemap file into the “Add new sitemap” field.
- Click on “Submit.”
Upon submission, Google will start processing your sitemap and indexing any new or updated URLs.
Monitoring Your Sitemap’s Status
After submitting your sitemap, monitoring its status is vital to check for any issues or errors. To do this, return to the “Sitemaps” tab in the Google Search Console and view the “Submitted sitemaps” section. Here, you’ll find information about:
- The number of discovered URLs
- Whether your sitemap file is valid or contains errors/warnings
- The date Google last read it
If there are problems with your sitemap, you’ll see specific error messages in this interface, which will help you identify and fix them.
Updating Your Sitemap
Ensure your website remains SEO-friendly as you add new content, update your resources regularly or remove outdated pages, and ensure your sitemap is always up-to-date. Some CMS platforms like WordPress automatically update your sitemap whenever changes occur. However, if you created a manual XML sitemap file, remember to re-generate it and submit it again through Google Search Console after making significant changes to your site (e.g., adding new blog posts or revamping the website’s structure).
In conclusion, using sitemaps effectively is crucial for maximizing the potential of Google Search Console for SEO purposes. You can ensure optimal indexing efficiency and boost organic search traffic and rankings by creating an accurate and well-structured representation of your site’s content hierarchy and submitting regular updates via the Search Console platform.
Using Removals
Google Search Console offers a handy feature called ‘Removals’ to help website owners manage their content’s visibility on Google Search. The Removals tool provides easy access for quickly removing or temporarily hiding web pages from search results when necessary. This section explores how to effectively use this feature to enhance your website’s SEO standing.
Reasons for Removing Content
There could be several reasons why you might need to remove or hide content from Google Search:
- Outdated or duplicated content that no longer serves a purpose
- Sensitive information accidentally published on your site
- Pages containing errors leading to poor user experience
- Webpages under development that shouldn’t appear in search results yet
Regardless of the reason, understanding the removal process allows you to maintain better control over your online presence and enhance your overall site quality.
Types of Removal Requests
When using Google Search Console’s “Removals” tool, there are three primary removal request options available:
- Temporary removal: This action hides pages from search results for about six months and clears cached copies stored by Google.
- Clear cached URL: Only removes cached images and content snippets but does not delist the page itself from search results.
- Outdated content: A form designed to report dated information, prompting Google to update its search index accordingly.
Remember that each type of removal request serves a different purpose and carries various degrees of impact on your website’s visibility within Google Search.
Submitting a Removal Request
To submit a removal request using Google Search Console, follow these steps:
- Sign in and navigate to Search Console.
- Select the verified property (your website) you wish to manage.
- On the left-side menu, click “Index” and then choose “Removals.”
- To request a temporary removal or clear a cached URL, click on the “New request” button.
- Enter the webpage’s URL (make sure it’s compatible with your website property) and choose the appropriate action (“Temporary remove” or “Clear cache”).
- Click “Report outdated content” and follow Google’s instructions to provide the necessary information for outdated content requests.
Once submitted, the changes may take several hours to reflect on Google Search results. Be cautious when using this feature, as misuse can lead to unintended consequences regarding SEO performance and search visibility.
In conclusion, the Removals tool within Google Search Console offers an efficient way to manage your web pages’ visibility by temporarily or permanently removing them from search results. By making informed decisions based on your site’s specific needs, you can leverage this feature to optimize your online presence and gain an edge in search engine rankings.
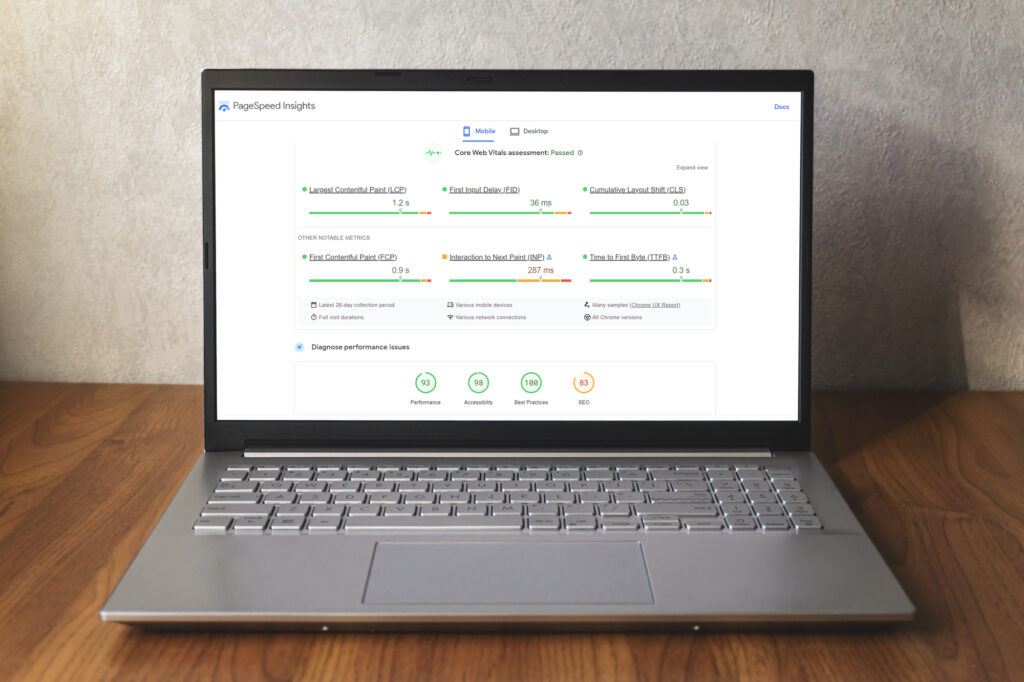
Using Core Web Vitals
One of the essential aspects of SEO is optimizing your website’s user experience, and Google’s Core Web Vitals play a crucial role in achieving this goal. In this section, let’s explore Core Web Vitals, why they matter for your website’s overall performance and SEO ranking, and how to use Google Search Console to monitor these critical metrics.
What are Core Web Vitals?
Core Web Vitals represent three key performance metrics that quantify various aspects of user experience on your website:
- Largest Contentful Paint (LCP): This measures the loading speed of your site and indicates the time it takes to display the most significant visible content element on the webpage.
- First Input Delay (FID): FID evaluates your site’s interactivity by determining how long a page responds when users interact with it.
- Cumulative Layout Shift (CLS): CLS assesses visual stability by quantifying unexpected layout shifts that disrupt the user experience.
Achieving an optimal result in each metric has become increasingly important as Google announced that starting from June 2021, Core Web Vitals would be incorporated into its search algorithm as an additional ranking factor.
Monitoring Core Web Vitals with Google Search Console
To effectively utilize Google Search Console for monitoring and improving your website’s Core Web Vital scores, follow these steps:
- Accessing the report: Log in to your Google Search Console account and navigate to > Core Web Vitals. A detailed summary showcases mobile and desktop data related to LCP, FID, and CLS metrics.
- Analyze issues: If problems are detected by the Search Console concerning any of these metrics, investigate further by using a combination of tools such as Lighthouse or PageSpeed Insights.
- Address identified issues: After identifying the root cause, start addressing the issues by implementing optimization techniques. For instance, reduce server response time to improve LCP, optimize JavaScript execution for FID, and avoid CSS layout shifts to maintain stability on your webpage.
- Monitor progress: SEO is not a one-time job; it requires consistent effort and monitoring your website’s performance. Regularly evaluate your Core Web Vitals data in Google Search Console to track improvements and identify new areas for further optimization.
Following these instructions on using Google Search Console to monitor Core Web Vitals can create a seamless user experience and boost your website’s ranking on search engine result pages (SERPs). Never underestimate the importance of providing an exceptional user experience – cater to users’ needs while staying ahead of changes within the digital landscape.
Using Accelerated Mobile Pages (AMP)
For a seamless mobile browsing experience, optimizing your website with the help of Accelerated Mobile Pages (AMP) is essential. AMP is an open-source project aiming to deliver fast-loading, visually appealing content for mobile users. By understanding how to use Google Search Console for SEO, you can tap into the benefits of leveraging AMP.
Why AMP Matters
Mobile internet usage has hugely increased in recent years. According to Statista, over 50% of global web traffic originates from mobile devices. Given this fact, prioritizing mobile performance can significantly impact user experience and search engine rankings. Google rewards websites using AMP through improved visibility in search results and better performance scores. Here’s how you can put AMP into action:
- Implementing AMP: First, implement AMPlified versions of your website pages using the official AMP plugin for popular content management systems like WordPress or custom development solutions.
- Testing Your Pages: Ensure the proper execution of your AMPlified pages by testing them with Google’s AMP Test Tool.
- Monitoring Your Results: Keep track of errors and fix them before they influence user experience negatively.
Monitoring AMP Performance in Search Console
Google Search Console offers valuable insights into your site’s overall usability regarding AMPlified content:
- Review the AMP Status Report: Navigate to the ‘Experience’ tab within Google Search Console, then click ‘Accelerated Mobile Pages.’ The report provides essential metrics on valid pages with errors, critical issues, warnings, and which have passed validation successfully.
- Inspect Specific URLs: Utilize the URL Inspection tool to analyze individual AMPlified pages and acquire more detailed information about their issues.
- Resolve Errors: As soon as you identify problems with your AMP implementation through Search Console insights, promptly address these errors, including making necessary coding fixes or implementing additional AMP techniques.
Going Beyond AMP
Although the advantages offered by AMP are significant, it’s essential to recognize other factors that contribute to a stellar mobile experience. Google Search Console for SEO can also help you monitor and improve other specific aspects of your website—namely, Mobile Usability and Core Web Vitals—which, in turn, affect overall user satisfaction on mobile devices.
To sum it up, incorporating Accelerated Mobile Pages is an excellent strategy for augmenting your site’s speed and mobile-friendliness, ultimately aiding your SEO efforts. By learning how to use Google Search Console, you will efficiently track errors associated with AMP while optimizing the more extensive on-site mobile experience.
Using Links to Your Site
Understand the Importance of Incoming Links
One vital aspect of your site’s SEO is its backlink profile, which consists of sites that link to your content. A strong backlink profile helps increase your domain authority and search engine rankings, leading to higher traffic, conversions, and revenue. Google Search Console is an essential tool you can use for monitoring these inbound links or backlinks.
Locate Inbound Link Data in Google Search Console
To access the valuable information about incoming links to your site:
- Sign in to Google Search Console.
- On the left panel, navigate to “Links.”
- You’ll see two primary sections: “External Links” and “Internal Links.”
In this context, we are primarily concerned with discovering insights under the “External links” section.
Analyze External Links Data
The “External links” section displays various data categories related to inbound linking:
- Top linked pages: These are the most frequently linked-to pages on your website from other domains.
- Top linking sites: Discover which websites are sending you the most backlinks.
- Top linking text: This reveals the anchor text external websites use when linking to your content.
Analyzing these three categories can generate valuable insights that benefit your overall SEO strategy.
Optimize Your Backlink Strategy with Insights from Google Search Console
Here are some essential steps to optimize your backlink acquisition plan using insights gathered in Google Search Console:
- Identify popular content: Recognize top-performing URLs that attract a substantial number of backlinks as high-value pages warranting further promotion or possible optimization for their target keywords.
- Evaluate the quality of referring domains: Analyze all referring domains and consider reaching out for collaboration opportunities based on domain authority and relevance to ensure a higher quantity and superior quality of incoming links.
- Review anchor texts: Ensure that external sites use diverse and relevant keywords as anchor texts for linking to your pages, thus signifying the importance of diverse keyword targeting.
- Leverage internal links: Strengthen the link authority of underperforming but valuable pages by utilizing internal links from higher authority pages within your website.
Remember always to abide by Google’s best practices for link-building and steer clear of methods that may be perceived as manipulative or violate their guidelines. By regularly monitoring your site’s backlink profile in Google Search Console, you’ll be better equipped to adjust your SEO strategy accordingly, ensuring excellent online visibility and competitive rankings on search engine results pages (SERPs).